The buying local movement is growing and there's a new site that's all about helping to connect people with vendors in their area that are providing unique or custom services. Whether you're looking for a new lawn service, some yummy cupcakes or you're interested in a private vintage clothing consultation - Zaarly has it all and it's all in your back yard!
I'm lucky to be in one of the first four cities that Zaarly has focused on here in Kansas City. I'm just starting my Zaarly adventure, but I think you'll find the site and the idea to be quite wonderful!
Here's a link to how Zaarly works: https://www.zaarly.com/howzaarlyworks
In addition to products being available online, Zaarly has started to host monthly Bazaars. The coolest thing about the Bazaars? FREE money!! You heard me! For everyone that registers to attend you'll get $20 to spend with the Zaarly vendors that day at the Bazaar. It's a great way to try out product and support artisans and vendors in your community.
I'll be at the April Zaarly Bazaar - it'll be held on April 28th from 3-6pm at the KC Guild. I'm excited to join this vibrant, growing community and I hope all of you who enjoy buying local will come out and support this new endeavor!
My Zaarly shop - https://www.zaarly.com/vntgbaublesnbits
Showing posts with label upcycle. Show all posts
Showing posts with label upcycle. Show all posts
Monday, April 22, 2013
Wednesday, May 2, 2012
Crafty Me - Turning a Pair of Heels into a Ring Display
I saw a photo of a super cute ring display online the other day and I thought - I can make that! It starts with a pair of heels, cute fabric and a piece of seat foam!
 I've been thrifting vintage shoes for awhile now and I really loved the
faux alligator print on these black heels, but the lining was pretty
shot. So I decided to use them for my project. They were the perfect size and shape for what I wanted to accomplish.
I've been thrifting vintage shoes for awhile now and I really loved the
faux alligator print on these black heels, but the lining was pretty
shot. So I decided to use them for my project. They were the perfect size and shape for what I wanted to accomplish.
The fabric I picked up at The Upcycle Exchange - I traded in a bunch of costume jewelry pieces and odds and ends for store credit and loved this because of the lime green stripes that are very similar to my logo. I thought the fabric would look cute, but hopefully not be too overwhelming once rings were added to it. I made a point to minimize the amount of flowers you see so that print wouldn't be too busy.
There are only four other items you need to complete this project - scissors, fabric glue, foam cushion and a pen. I bought the foam cushion at an arts and crafts store - it was meant to be a seat cushion for a chair, but it's the perfect amount for a smaller project like this.

Supply list:
Step One - Foam Patterns
Trace the toe of the shoe on the foam. You'll want to be pretty close to perfect on this, as this particular piece will slide down into the shoe itself. You should measure it to be about 1/2in longer than where the lip of the toe starts, that way it sticks out enough when put in the shoe to actually hold a ring. (See photos)
Once you have traced out the toe of the shoe measure the width of the shoe every 1in or so. You'll need to cut out pieces in these lengths for the rest of the holders. I needed seven pieces for this pair of heels, but you may need more or less depending on the thickness of your foam and the length of the shoe. I made each of my foam pieces 1in wide and then the different length measurements I had taken earlier.
Step Two - Fabric Pattern
The next step is creating fabric patterns for each piece of foam. You want to measure each piece of foam and then trace a pattern on the fabric to match it. You'll measure the length of the foam and add an inch to each side, then you'll measure the height, double it and add it to the width. So if you have a 2in x 1 1/2in by 1in piece of foam your fabric square should be 4in by 4in. (Note, I did not cover the bottom of the foam pieces, the bottom of the cubes was left uncovered so it would be even).

 Step Three - Glue Fabric to Foam
Cut out your fabric squares and then we're ready to glue! This step is like wrapping a present. I put fabric glue all over the fabric, lined the edge of one of my cubes of foam up to the edge of the fabric (be sure to leave yourself the inch on either side) then rolled the cube so the fabric covers one side, then the top, then the second side. From here you'll create the little folds on the edges just like wrapping a box, adding glue as you need to hold down the flaps. Do this to both edges so that only the bottom of your foam cube is uncovered.

Do this with all of your foam cubes.
Step Four - Assemble
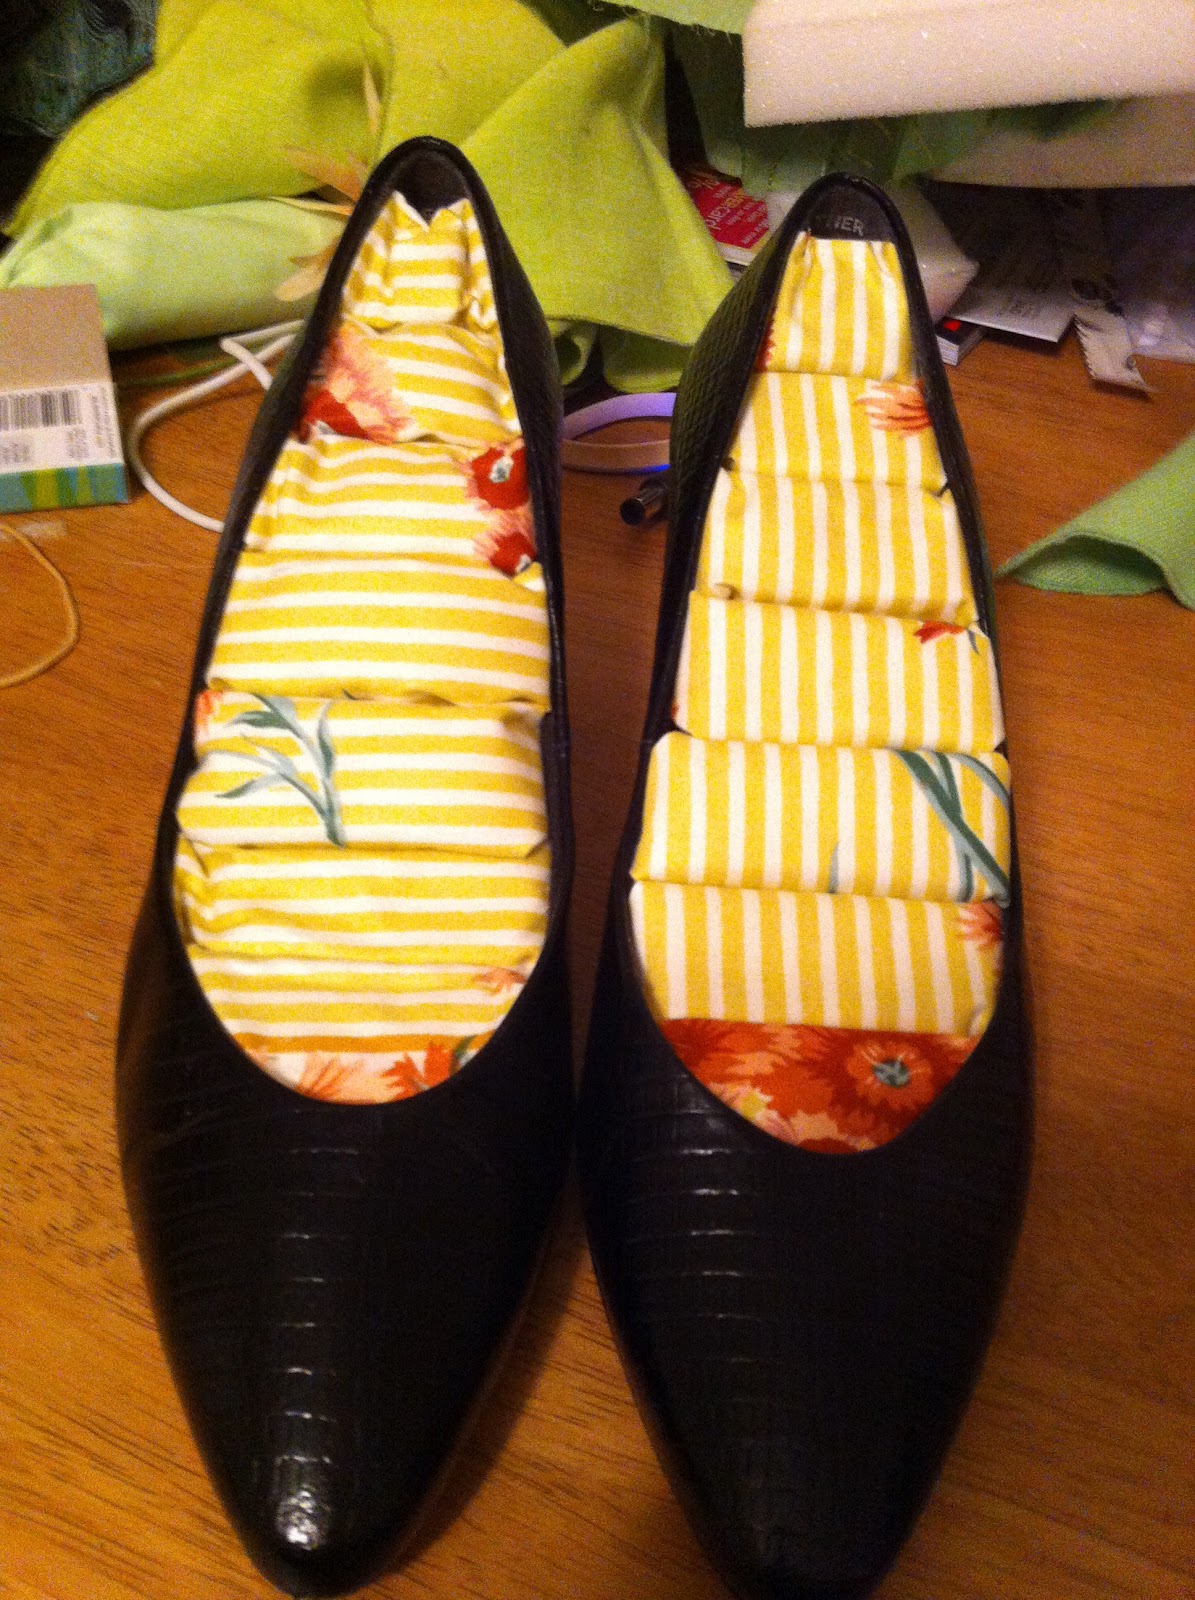
Here I put glue on the inside of the shoe and began placing my fabric covered foam inside the shoe just like the pattern showed. First the pointed toe, then the longest piece of foam to the shortest piece of foam. You want the foam to fit snug, but not too snug that it bunches up. Let the glue dry and you're all set!

The fabric I picked up at The Upcycle Exchange - I traded in a bunch of costume jewelry pieces and odds and ends for store credit and loved this because of the lime green stripes that are very similar to my logo. I thought the fabric would look cute, but hopefully not be too overwhelming once rings were added to it. I made a point to minimize the amount of flowers you see so that print wouldn't be too busy.
There are only four other items you need to complete this project - scissors, fabric glue, foam cushion and a pen. I bought the foam cushion at an arts and crafts store - it was meant to be a seat cushion for a chair, but it's the perfect amount for a smaller project like this.
Supply list:
- A pair of heels
- Fabric (about 1/4th of a yard)
- Foam cushion (1-1 1/2in thick)
- Fabric glue
- Scissors
- Pen
Step One - Foam Patterns
Trace the toe of the shoe on the foam. You'll want to be pretty close to perfect on this, as this particular piece will slide down into the shoe itself. You should measure it to be about 1/2in longer than where the lip of the toe starts, that way it sticks out enough when put in the shoe to actually hold a ring. (See photos)
Once you have traced out the toe of the shoe measure the width of the shoe every 1in or so. You'll need to cut out pieces in these lengths for the rest of the holders. I needed seven pieces for this pair of heels, but you may need more or less depending on the thickness of your foam and the length of the shoe. I made each of my foam pieces 1in wide and then the different length measurements I had taken earlier.
 | |||
| Basic Foam Pattern Idea |
Step Two - Fabric Pattern
The next step is creating fabric patterns for each piece of foam. You want to measure each piece of foam and then trace a pattern on the fabric to match it. You'll measure the length of the foam and add an inch to each side, then you'll measure the height, double it and add it to the width. So if you have a 2in x 1 1/2in by 1in piece of foam your fabric square should be 4in by 4in. (Note, I did not cover the bottom of the foam pieces, the bottom of the cubes was left uncovered so it would be even).

 Step Three - Glue Fabric to Foam
Cut out your fabric squares and then we're ready to glue! This step is like wrapping a present. I put fabric glue all over the fabric, lined the edge of one of my cubes of foam up to the edge of the fabric (be sure to leave yourself the inch on either side) then rolled the cube so the fabric covers one side, then the top, then the second side. From here you'll create the little folds on the edges just like wrapping a box, adding glue as you need to hold down the flaps. Do this to both edges so that only the bottom of your foam cube is uncovered.

Do this with all of your foam cubes.
Step Four - Assemble
Here I put glue on the inside of the shoe and began placing my fabric covered foam inside the shoe just like the pattern showed. First the pointed toe, then the longest piece of foam to the shortest piece of foam. You want the foam to fit snug, but not too snug that it bunches up. Let the glue dry and you're all set!
Thursday, April 12, 2012
Part X - I Don't Wear Brooches! A Series on Ways to Repurpose Vintage Brooches
This is the final post in my series on fun, simple ways to use vintage brooches. For the 10th post we'll talk about belts! A vintage brooch can turn a belt into a work of art with a few simple techniques!
First - The scarf belt and using a vintage brooch as the fastener - If you have vintage scarves already this is a great way to combine both!

Second - Skinny metal belt with brooch - This is a simple way to slide a brooch over the belt and add some flair to a goldtone belt!

Third - Ribbon Belt - again ribbons are your best friend! Look how elegant a simple ribbon held with a vintage brooch can be on a dress!

Fourth - The leather belt and brooch. For this I recommend a large brooch. Since leather is so hard to puncture you need a brooch that can fasten around the leather. Try to find a brooch that's pin is just a bit wider than the width of the belt and if possible use a thin leather belt, this will give you the most successful results.

This concludes my series on simple, quick, unusual ways to use vintage brooches. If you missed the rest of the series be sure to go back and look at posts 1-9!
Which idea was your favorite? Which one inspired you? The next time you see a vintage brooch will you say "This brooch is beautiful, but I don't wear brooches?"
First - The scarf belt and using a vintage brooch as the fastener - If you have vintage scarves already this is a great way to combine both!

Second - Skinny metal belt with brooch - This is a simple way to slide a brooch over the belt and add some flair to a goldtone belt!
Third - Ribbon Belt - again ribbons are your best friend! Look how elegant a simple ribbon held with a vintage brooch can be on a dress!
Fourth - The leather belt and brooch. For this I recommend a large brooch. Since leather is so hard to puncture you need a brooch that can fasten around the leather. Try to find a brooch that's pin is just a bit wider than the width of the belt and if possible use a thin leather belt, this will give you the most successful results.
This concludes my series on simple, quick, unusual ways to use vintage brooches. If you missed the rest of the series be sure to go back and look at posts 1-9!
Which idea was your favorite? Which one inspired you? The next time you see a vintage brooch will you say "This brooch is beautiful, but I don't wear brooches?"
Subscribe to:
Posts (Atom)