
The fabric I picked up at The Upcycle Exchange - I traded in a bunch of costume jewelry pieces and odds and ends for store credit and loved this because of the lime green stripes that are very similar to my logo. I thought the fabric would look cute, but hopefully not be too overwhelming once rings were added to it. I made a point to minimize the amount of flowers you see so that print wouldn't be too busy.
There are only four other items you need to complete this project - scissors, fabric glue, foam cushion and a pen. I bought the foam cushion at an arts and crafts store - it was meant to be a seat cushion for a chair, but it's the perfect amount for a smaller project like this.
Supply list:
- A pair of heels
- Fabric (about 1/4th of a yard)
- Foam cushion (1-1 1/2in thick)
- Fabric glue
- Scissors
- Pen
Step One - Foam Patterns
Trace the toe of the shoe on the foam. You'll want to be pretty close to perfect on this, as this particular piece will slide down into the shoe itself. You should measure it to be about 1/2in longer than where the lip of the toe starts, that way it sticks out enough when put in the shoe to actually hold a ring. (See photos)
Once you have traced out the toe of the shoe measure the width of the shoe every 1in or so. You'll need to cut out pieces in these lengths for the rest of the holders. I needed seven pieces for this pair of heels, but you may need more or less depending on the thickness of your foam and the length of the shoe. I made each of my foam pieces 1in wide and then the different length measurements I had taken earlier.
 | |||
| Basic Foam Pattern Idea |
Step Two - Fabric Pattern
The next step is creating fabric patterns for each piece of foam. You want to measure each piece of foam and then trace a pattern on the fabric to match it. You'll measure the length of the foam and add an inch to each side, then you'll measure the height, double it and add it to the width. So if you have a 2in x 1 1/2in by 1in piece of foam your fabric square should be 4in by 4in. (Note, I did not cover the bottom of the foam pieces, the bottom of the cubes was left uncovered so it would be even).

 Step Three - Glue Fabric to Foam
Cut out your fabric squares and then we're ready to glue! This step is like wrapping a present. I put fabric glue all over the fabric, lined the edge of one of my cubes of foam up to the edge of the fabric (be sure to leave yourself the inch on either side) then rolled the cube so the fabric covers one side, then the top, then the second side. From here you'll create the little folds on the edges just like wrapping a box, adding glue as you need to hold down the flaps. Do this to both edges so that only the bottom of your foam cube is uncovered.

Do this with all of your foam cubes.
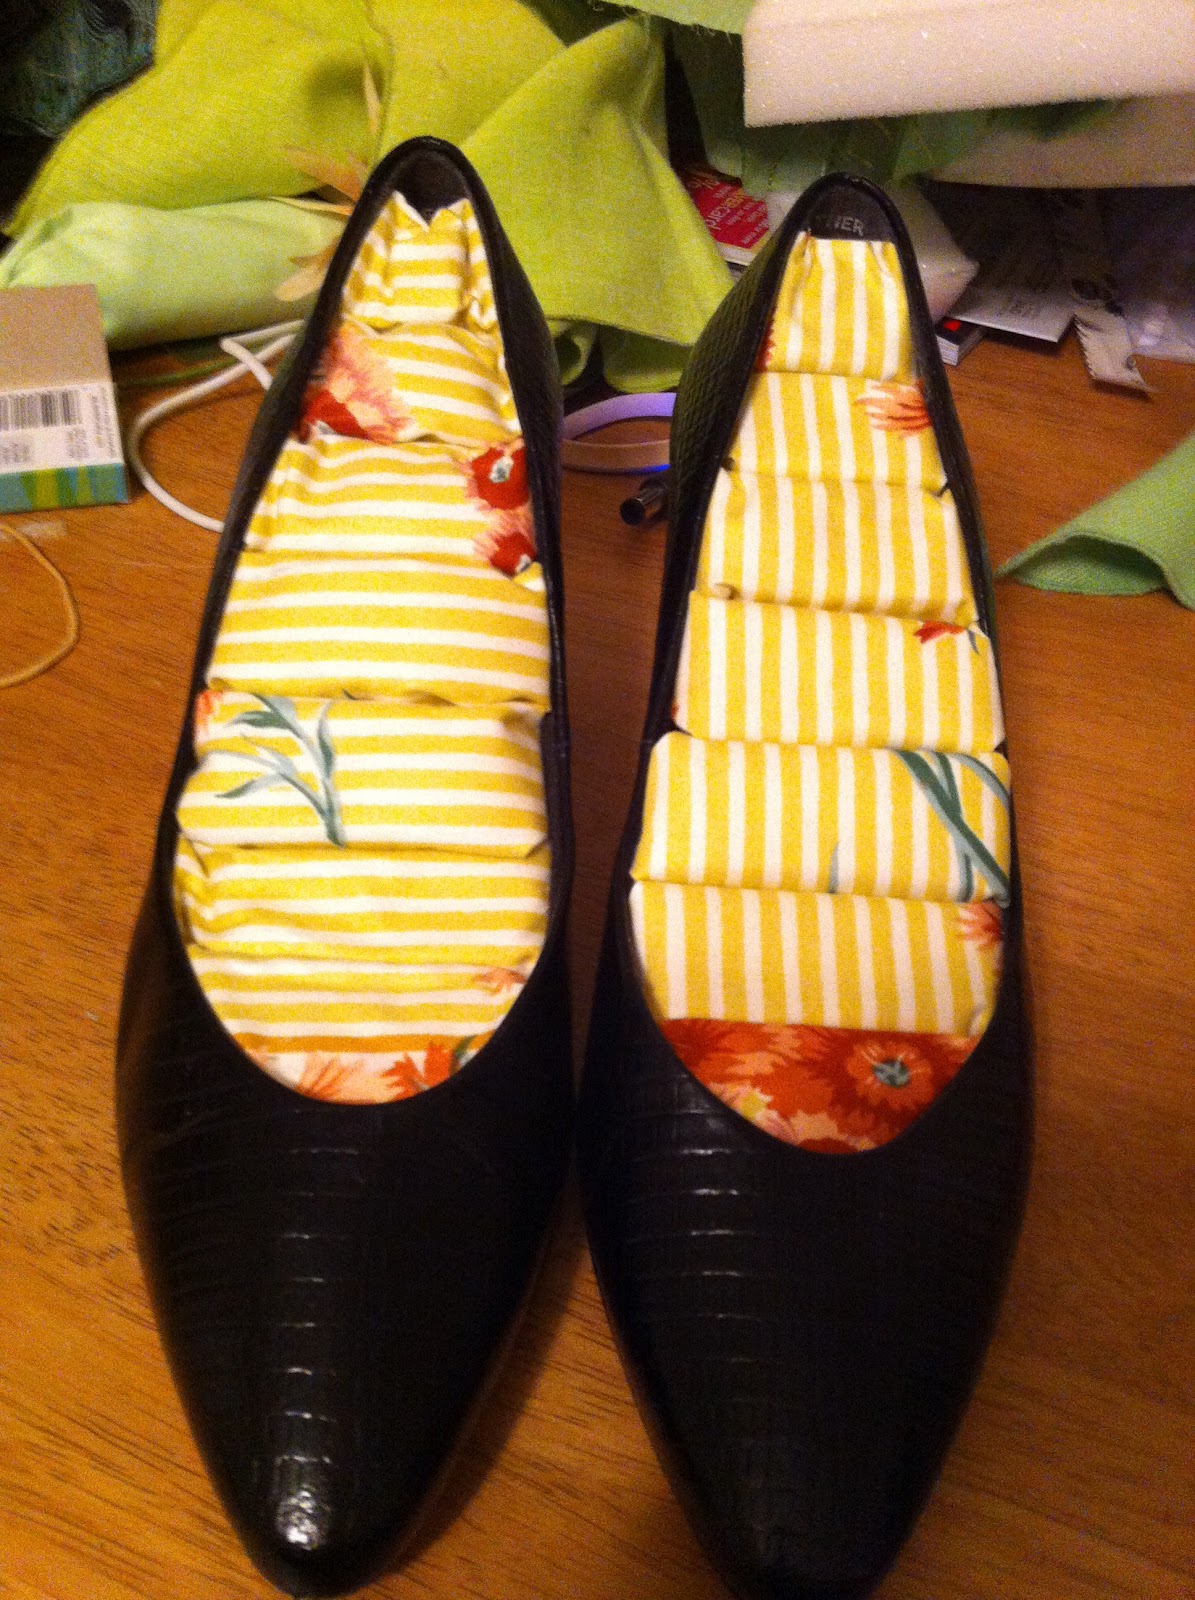
Step Four - Assemble
Here I put glue on the inside of the shoe and began placing my fabric covered foam inside the shoe just like the pattern showed. First the pointed toe, then the longest piece of foam to the shortest piece of foam. You want the foam to fit snug, but not too snug that it bunches up. Let the glue dry and you're all set!
No comments:
Post a Comment
Note: Only a member of this blog may post a comment.