Showing posts with label guide. Show all posts

Wednesday, May 2, 2012

Crafty Me - Turning a Pair of Heels into a Ring Display

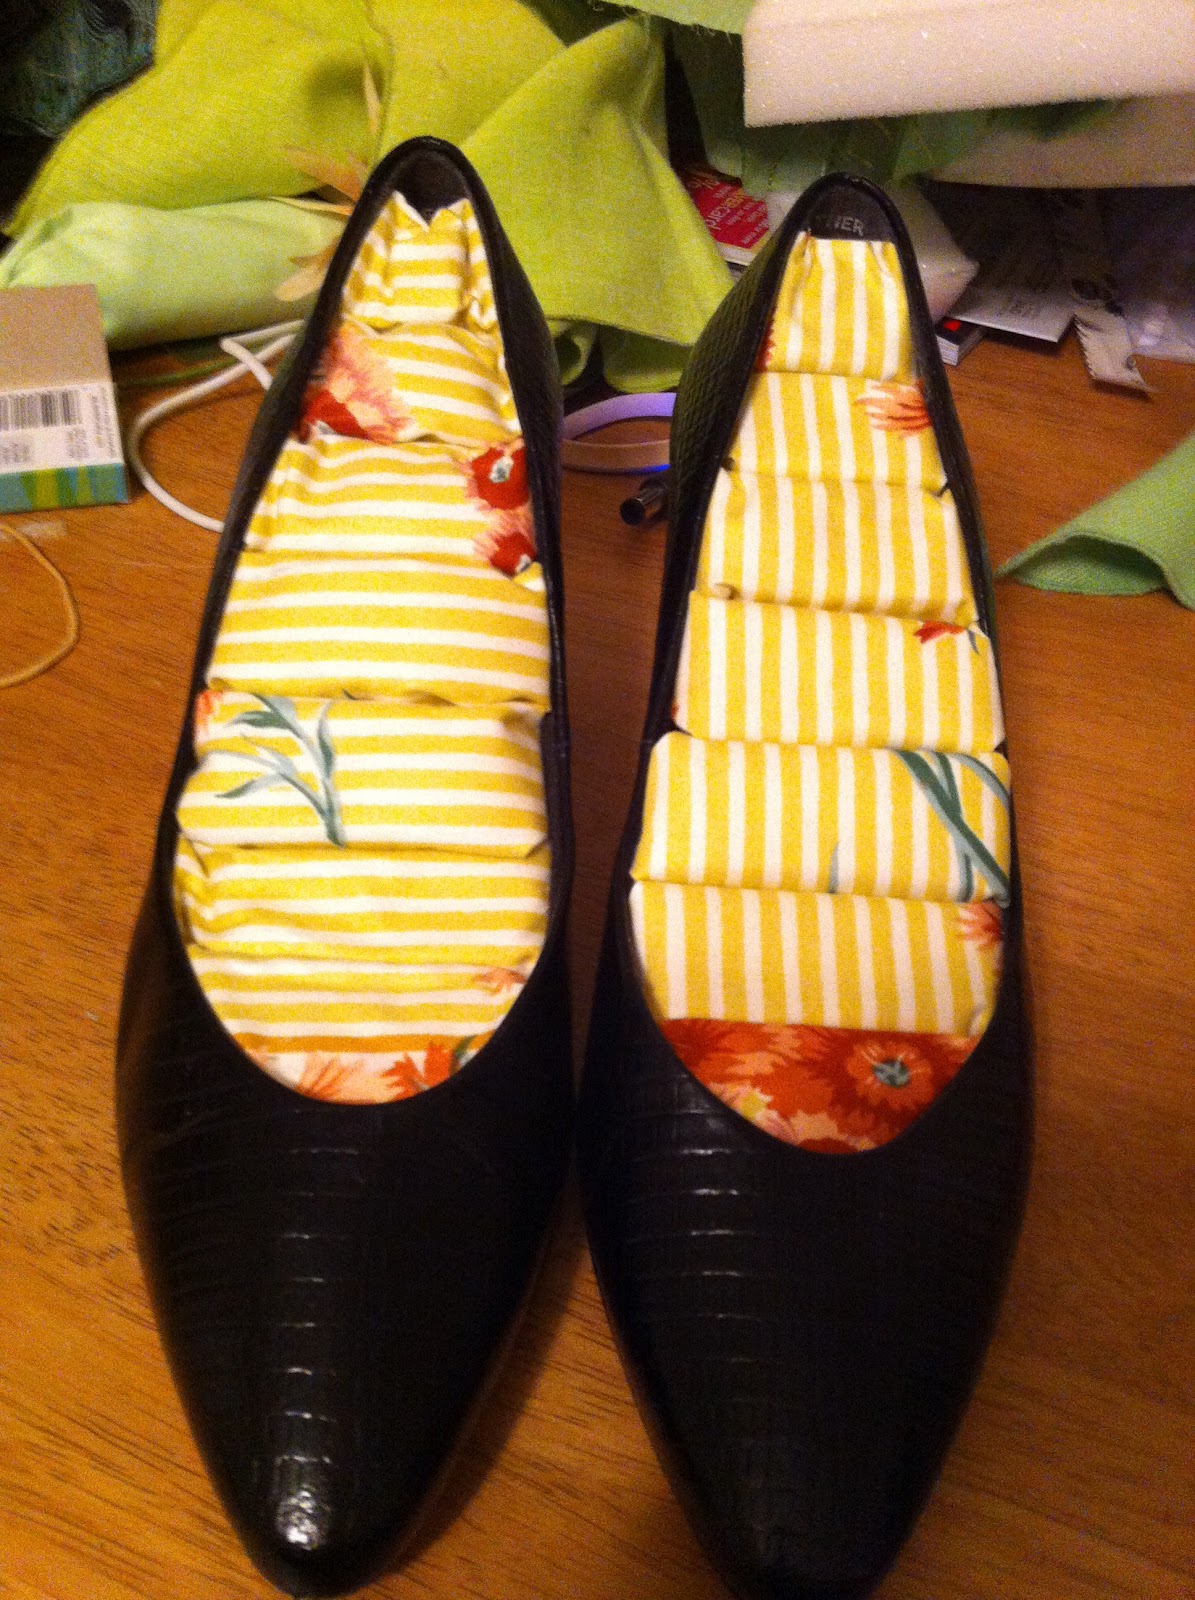
I saw a photo of a super cute ring display online the other day and I thought - I can make that! It starts with a pair of heels, cute fabric and a piece of seat foam!

I've been thrifting vintage shoes for awhile now and I really loved the faux alligator print on these black heels, but the lining was pretty shot. So I decided to  use them for my project. They were the perfect size and shape for what I wanted to accomplish.

The fabric I picked up at The Upcycle Exchange - I traded in a bunch of costume jewelry pieces and odds and ends for store credit and loved this because of the lime green stripes that are very similar to my logo. I thought the fabric would look cute, but hopefully not be too overwhelming once rings were added to it. I made a point to minimize the amount of flowers you see so that print wouldn't be too busy.

There are only four other items you need to complete this project - scissors, fabric glue, foam cushion and a pen. I bought the foam cushion at an arts and crafts store - it was meant to be a seat cushion for a chair, but it's the perfect amount for a smaller project like this.


Supply list:
  • A pair of heels
  • Fabric (about 1/4th of a yard)
  • Foam cushion (1-1 1/2in thick)
  • Fabric glue
  • Scissors
  • Pen


Step One - Foam Patterns
Trace the toe of the shoe on the foam. You'll want to be pretty close to perfect on this, as this particular piece will slide down into the shoe itself. You should measure it to be about 1/2in longer than where the lip of the toe starts, that way it sticks out enough when put in the shoe to actually hold a ring. (See photos)

Once you have traced out the toe of the shoe measure the width of the shoe every 1in or so. You'll need to cut out pieces in these lengths for the rest of the holders.  I needed seven pieces for this pair of heels, but you may need more or less depending on the thickness of your foam and the length of the shoe. I made each of my foam pieces 1in wide and then the different length measurements I had taken earlier.


Basic Foam Pattern Idea


Step Two - Fabric Pattern


The next step is creating fabric patterns for each piece of foam. You want to measure each piece of foam and then trace a pattern on the fabric to match it. You'll measure the length of the foam and add an inch to each side, then you'll measure the height, double it and add it to the width. So if you have a 2in x 1 1/2in by 1in piece of foam your fabric square should be 4in by 4in. (Note, I did not cover the bottom of the foam pieces, the bottom of the cubes was left uncovered so it would be even).


Step Three - Glue Fabric to Foam

Cut out your fabric squares and then we're ready to glue! This step is like wrapping a present. I put fabric glue all over the fabric, lined the edge of one of my cubes of foam up to the edge of the fabric (be sure to leave yourself the inch on either side) then rolled the cube so the fabric covers one side, then the top, then the second side. From here you'll create the little folds on the edges just like wrapping a box, adding glue as you need to hold down the flaps. Do this to both edges so that only the bottom of your foam cube is uncovered.

Do this with all of your foam cubes.

Step Four - Assemble

Here I put glue on the inside of the shoe and began placing my fabric covered foam inside the shoe just like the pattern showed. First the pointed toe, then the longest piece of foam to the shortest piece of foam. You want the foam to fit snug, but not too snug that it bunches up. Let the glue dry and you're all set!


Friday, October 7, 2011

Plus Sized Vintage - How to Make it Work

So as a girl of not-so-skinny proportions who happens to love vintage, I run into conundrums on a regular basis. One - finding vintage clothing in plus sizes is hard! Two - when you do find it, it isn't always cute. Three - what was plus-sized then, may not be today. Believe me, when I find a dress that fits - I keep it. There is no putting that up on Etsy or at flea markets!

Here are some tips for when you're searching for plus-sized vintage to keep in mind, especially if you're searching online.

1) Invest in a flexible tape measure, the kind you can pick up for like $2 at any sewing store, and measure yourself! Be honest in your measurements, you don't have to share them, but be sure to be accurate. I found this page on measuring yourself correctly to be really helpful. What I liked about it is that it shows you measurements that you often forget - like your arms! I can't tell you how many times something has fit everywhere else, but the armholes were just too tight. For a plus-size girl this is an important measurement that's often left off of listings. Don't be afraid to ask the seller to measure this for you.

Also, consider buying items that may measure an inch or two bigger than your actual measurements. I know, we all love to stick to the skinnier sizes - I feel your pain! But honestly, you look so much better if something isn't skin tight and fits appropriately and a little give can give you room to have the piece tailored if you need to. It's always easier to alter something that's too big, than too small.

2) Look for dresses or shirts and skirts that offer the following:
  • Elastic
  • Stretch fabric
  • "Open" hips
  • High-waisted
What I've learned is that elastic is your friend, especially on those days where water weight is not. Dresses that have elastic at the waist can usually fit more figure types. Fabric with a little give is always good too, there's nothing more embarrassing than blowing a seam, I've been there too... On dresses if the listing says "open" hips that means the dress usually has some flair to it and that too is slimming, less restricting and usually more flattering. High-waisted dresses and skirts are also great. Normally you're the skinniest at your natural waist, so things look more flattering if they hit you there.

3) Accessorize! Look for things like:
  • Belts
  • Heels
  • Tights
  • Boots
  • Hats
  • Gloves
  • Purses
  • Jewelry
Often a little boost from an accessory can turn a vintage dress from nice or ho-hum into va-va-va-voom! If the dress looks like a sack (which sack dresses were a 60s and 70s trend) cinch it in with a nice belt, skinny if you want to look delicate, big if you want to really add a splash of color. Heels almost always look better with vintage, just think about it all the housewives wore them! Plus, they make your legs look skinner, boost up your bum and tend to give the illusion of a flatter tummy - just pick comfy ones! Same goes for boots and tights. You can really make a vintage piece more modern by adding tights and ankle boots this season.

Then if you're looking for a little fun gloves, purses and jewelry can add a punch. No one really wears elegant gloves anymore and it's a shame. They can make your hands looks so delicate and they came in so many styles. I love to wear mine when I head out somewhere nice. It's a touch of class automatically. I also can't tell you the number of compliments I've received when I bust out some of my vintage handbags. They had so much flair! They weren't about shoving everything and the kitchen sink in the biggest bag possible, they were about style, art and elegance. Trust me on this one! And the jewelry is a given. Nothing looks nicer than some sparkles!

The final, number one rule to dressing vintage in plus-sizes? Wear what fits you and flatters your figure. The style guide isn't that different from today. Learn what shapes fit you best and search for them. They're out there girls!

As a helpful hand in your search here are three Etsy sellers that either have a plus-sized section in their shops or carry a fair amount of plus-sizes. I can personally speak for threadoverheels, as I've purchased from her myself and I think I've "favorited" more than a dozen of her dresses. But I also liked what I found at iloveswift and sarahblackheart.

Happy shopping!